These instructions are applicable to Bugcount® Fuel Test Kit | 3 tests and Bugcount® Fuel Test Kit | 25 tests.
To ensure that results obtained from Bugcount® Fuel testing are reliable, samples must be collected and handled in accordance with application-specific standards and guidance for microbiological sampling and testing.
Bugcount® Fuel is compliant with ASTM D7687 Standard Practice for Measurement of Cellular Adenosine Triphosphate in Fuel and Fuel Associated Water with Sample Concentration by Filtration.
General sampling guidance :
Minimize delays between sampling and testing.
Clean and disinfect area around sampling port’s external surfaces, work surface, and sampling device’s internal surfaces.
Collect samples in previously unused, preferably sterile, sample containers.
Personal protection equipment (e.g., nitrile gloves, safety glasses, etc.) is recommended to be worn for the entire procedure.
If you are new to this test, please refer to the Full Method to follow the steps in detail.
Log in to Relay™log in and and select RUN TESTS at the site you are working with. If you are not using Relay™, skip this step.
Rehydrate Luminase with contents of the Buffer vial. Mix, and wait 5 minutes.
Background: Add 1 pipette of Luminase to a clean test tube and READ Background RLU.
Calibration: Mix 2 drops of UltraCheck 1 into the test tube used for Background containing Luminase and READ RLU ATP1.
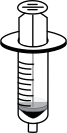
Capture: Push up to 50mL of sample through the 50mL syringe + filter (record Volume).
Clean: Push 1 tube of LumiClean through 50mL syringe.
Dry: Push the plunger through the empty syringe to dry.
Release: Push 1 tube of UltraLyse 7 through syringe + filter into an UltraLute tube. Cap and invert 3 times.
Assay: Add 1 pipette of UltraLute solution to a tube with 1 pipette of Luminase. Swirl and READ RLU cATP.
Calculate: If using Relay™, select SAVE TEST. If not using Relay™, calculate your results on the Bugcount® analyzer or manually.
Component list
Kit component
Image
Luminase Buffer vial
(store at 20°C)
Luminase Enzyme
vial
(Store re-hydrated enzyme for 25 test kit at 4°C)
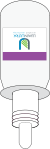
UltraCheck 1 dropper bottle
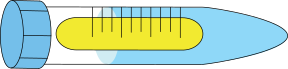
UltraLyse 7
tube
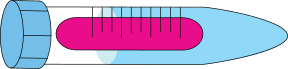
UltraLute
(dilution) tube
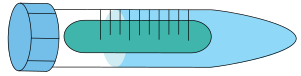
LumiClean
tube
Syringe filters
12x55mm test tubes
Exact volume pipette, 100μL
50mL syringe, PP/PP
Note: Kit components may vary in appearance, packaging, labeling, or manufacturer periodically. These changes do not affect their intended use. Use only components supplied or approved by Luminultra.
This test kit may be performed with either of the following luminometers:
Bugcount One ATP Analyzer
PhotonMaster & PBM
Getting started
Measure Background and Luminase enzyme strength
This step only needs to be done once per testing session, or upon opening a new bottle of enzyme.
Personal protection equipment (e.g., nitrile gloves, safety glasses, etc.) is recommended to be worn for the entire procedure.
Turn on the luminometer.
Empty the Luminase Buffer into the vial of Luminase Enzyme vial and wait 5 minutes for the solution to dissolve.
Using a fresh exact volume pipette, add the rehydrated Luminase Enzyme solution to a new, clean test tube. Place this test tube into the luminometer and take a reading.
Record the result in the table provided as B Background RLU. This reading should always be less than 100 RLU.
Remove test tube from the luminometer, add 2 drops of UltraCheck 1, then swirl to mix it with the Luminase Enzyme solution.
Place this test tube into the luminometer, close the lid, and take a reading.
Record the result in the table provided as C ATP1 RLU. This reading should always be greater than 5,000. If the reading is below 5,000, contact Customer Service.
If the background is above 100 RLU, visit FAQs at my.luminultra.com for troubleshooting steps. If backgrounds above 100 RLU persists, contact help@luminultra.com.
Using the exact volume pipettes
Ensure pipette tips do not come in contact with any surface prior to use.
Squeeze the top bulb, dip the stem into the liquid and release the bulb.
Squeeze the top bulb again to release the liquid.
The pipette is designed to transfer the correct amount of liquid. Any excess will remain in the pipette.
Discard after use.
Cellular ATP Analysis
1. Capture – Isolate live cells
Mix the sample well; remove the plunger from the 50mL syringe and attach a new syringe filter.
Pour the recommended volume of sample into the syringe (Fuel: 20mL | Fuel-associated water: 5mL). Other sample volumes do impact the calculations, for more information, see the note on step 5.
Use the plunger to slowly push the sample through the filter into a waste container.
Detach the filter, then remove the plunger from the syringe.
2.1. Clean – Remove interferences
Re-attach the filter to the syringe.
Empty a LumiClean tube into the syringe.
Use the plunger to slowly push the LumiClean through the filter into a waste container.
Detach the filter, then remove the plunger from the syringe.
2.2 Dry – Remove interferences
Re-attach the filter to the syringe.
Use the plunger to slowly push air through the syringe to dry the filter.
Detach the filter, then remove the plunger from the syringe.
3. Release – Release ATP from the filter to get final sample extract
Re-attach the filter to the syringe.
Empty an UltraLyse 7 tube into the syringe
Use the plunger to slowly push the UltraLyse 7 through the filter into a new UltraLute (dilution) tube.
Cap the tube and invert 3 times to mix well. This sample is now ready for step 4.
4. Measure sample relative light units (RLU)
Using a fresh exact-volume pipette (see TIP box for guidance), add the Luminase Enzyme solution to a new, clean test tube.
Using a fresh exact-volume pipette, transfer the sample from Step 3 into the same test tube as the Luminase Enzyme solution, then swirl to mix.
Place this test tube into the luminometer and take a reading.
Record the result in Relay™, on the Bugcount® analyzer, or in the table provided as A cATP RLU.
5. Quantify ATP
Tip: Relay™ AND Bugcount analyzer can do the work For you
When all inputs are entered in Relay’sRun tests workflow, the results will calculate automatically. Select Save Test to catalog and share your results with your team. Or, run the test on the Bugcount analyzer and import the results to Relay for sharing.
Alternatively, you can manually calculate your test result using one of the simple calculations shown below corresponding to your sample type. This calculation will convert the RLU output of the luminometer to cellular ATP (cATP), which is reported in pg/mL as your final test results. If performing more than 3 tests, copy the table below into a spread sheet or notebook in order to keep results and calculations organized.
The categorical rating thresholds (for example 10pg/mL) provided in this are based on general experience with microbiological contamination in fuel systems. It is recommended that test kit users develop a record of the relationship between ATP test results and other observations to develop categorical thresholds that meet their specific needs.
Support
Troubleshooting
Issue
Recommendation
Readings are lower than expected values
Ensure reagents are not expired (expiry information can be found on reagent vials). Ensure reagents are being stored properly (storage information can be found on reagent vials)
Background readings are higher than expected
If using the Bugcount® One ATP Analyzer, replace the chamber using the Bugcount® One ATP Analyzer Maintenance Kit. If using the PhotonMaster, quarterly cleaning (LCK) is recommended. Annual linearity verification is also recommended using the Luminometer Standardization Kit. All kits are available for purchase from Luminultra.